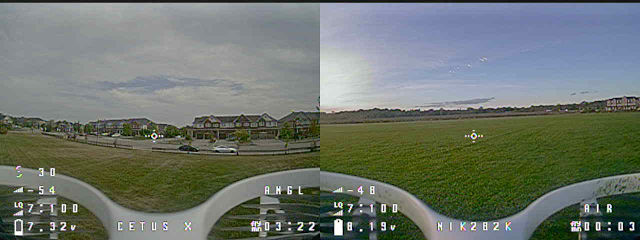
BetaFlight is flight control software used on first person view multi-rotor aircraft, it translates users inputs to motor speeds and returns information to the pilot via an on screen display (OSD) in the video feed.
The OSD information is made up of alphanumeric characters, punctuation, and other symbols arranged to convey dynamic information like battery voltage or control link quality, and static information like the pilot name. A staple of FPV flying is for pilots to add their own moniker to the OSD in order to permanently associate their name with their flying skills. Lacking any and all flying skills, I decided to spend time on customizing my moniker instead.
When you first boot your craft, BetaFlight displays a splash screen with the BetaFlight logo and information on how to access the OSD menu system.
This logo is a 288x72px tri-chrome image (black, white and green, with green being rendered as transparent) that can be replaced using a built in function of the BetaFlight Configurator software. When creating your logo image make sure the final exported image is an 8-bit RGB PNG file, if there is an alpha channel in your image it will not work.
 |
| Green is not rendered in the video feed. |
The next easiest change to make is replacing the craft's name (Cetus X) with my own, this is also easily done using the Configurator software.
That seems a little flat, the display is capable of rendering bitmaps as shown by the boot logo, battery indicator and other onscreen glyphs. It should be possible to add custom graphics to the inflight display.
The BetaFlight Cinfigurator allows for the uploading of custom fonts, with each font file consisting of 160 tiles used for OSD elements plus 96 tiles that store the bootlogo we edited earlier. After exploring the OSD menus I found that there were about a dozen tiles that were both not used in the OSD and still human typeable, this is important because there needs to be a way to make BetaFlight show the custom tiles.
 | |
| A map of the tiles that are 'available' for replacement |
The last 3 tiles are the crosshairs which can be placed at any location on the display, this makes them useful for adding an extra row to a single row graphic.
To get a custom image into the font it must first be fit into a number of 12x18px tiles I chose to make the 2 and 0 of my image fall exactly into one tile each, this allows them to be duplicated without filling up extra tiles. Eventually these tiles will be assigned to the characters " # @ ' , ; [ ] so when the craft name is changed to "#@',';;;[] the full logo will appear.
The tricky part is now getting these tiles into a font file. The original font files (.mcm) can be obtained directly from the BetaFlight Configurator's github they can then extracted using the MAX7456-Font-Tools (max.py) resulting in 256 numbered .PNG files. Each of the custom image tiles can now be exported to a 12x18px image of the correct number to replace the original character in the tile set, making sure that they are 8-bit RBG PNG files. Once all the tiles have been replaced the MAX-7456 font tools can be used again to re-pack the numbered .PNGs into a .mcm font file compatible with BetaFlight.
In the BetaFlight Configurator the new font file can be uploaded to the craft (as well as the custom boot logo from earlier). The craft name can then be set to the string of characters that correspond to the custom tiles and it's done.
A custom bitmap displayed inflight without disrupting any of the other functions or information on the OSD or OSD menu!
Bonus: The little Cetus X icon on the right is made of 6 tiles, the upper 3 are the crosshairs' tiles, the lower 3 are displayed using the pilot's name to get an image that is taller that one tile.


